Thinking of upgrading your bathroom? Whether you live in a classic Camden townhouse, a modern flat in Islington, or a cosy home in Hackney, waterproofing your shower walls is the key to a lasting renovation. Without it, water seeps through grout lines and damages plaster, tiles, or even the structure beneath.
In this guide, you’ll learn how to waterproof a shower wall before tiling, the 4 types of shower waterproofing, and how to make your bathroom truly watertight. Read on to learn more.
Why Waterproofing Matters
Waterproofing isn’t just about avoiding leaks; it’s about protecting your walls, preventing mould and saving money on future repairs. Bathrooms are constantly exposed to moisture, especially around showers and sinks.
Without proper sealing, even the best tiles can’t stop water from finding its way through tiny cracks.
So, if you’re wondering, can you tile straight onto plasterboard in a bathroom? The answer is no, not without waterproofing first.
What You’ll Need
Before you start, gather the right materials. Quality products make all the difference.
- Waterproofing primer or sealer
- Tanking membrane or waterproof boards
- Waterproof tape for corners and joints
- Flexible tile adhesive
- Silicone sealant
- Roller, brush, and utility knife
For homes across Islington and Hackney, where bathrooms often have plasterboard walls, it’s vital to use moisture-resistant materials designed for damp conditions.
Step-by-Step: How to Waterproof a Shower Wall Before Tiling
Follow these simple steps to create a durable waterproof barrier.
Step 1. Inspect and Prepare the Surface
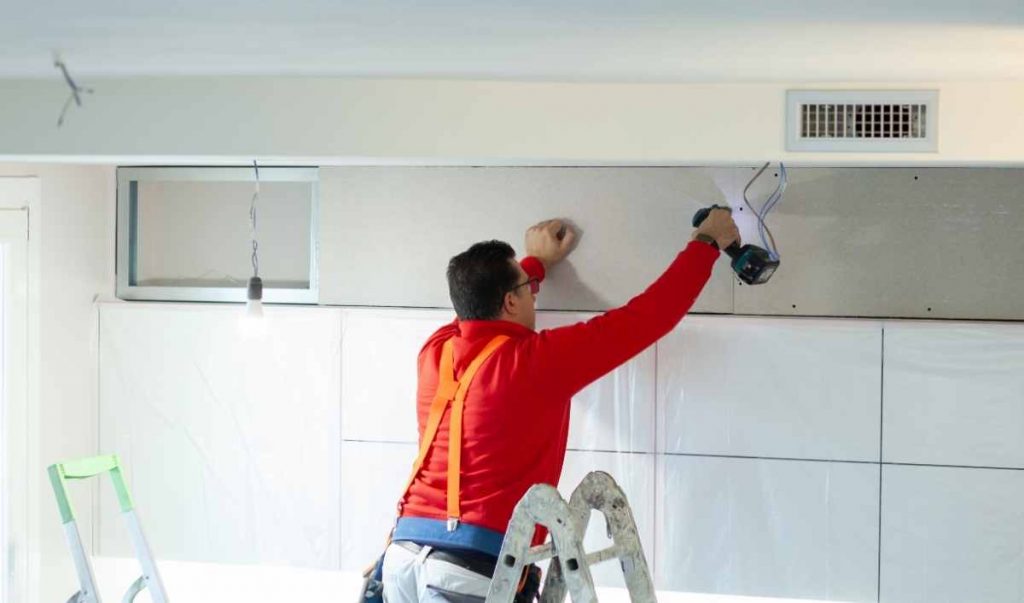
Start with clean, dry walls. Remove dust, grease, or peeling paint. If you’re working on how to prepare a plasterboard wall for tiling, make sure the boards are moisture-resistant (green or blue type). Standard plasterboard won’t last in wet zones. Check for cracks or gaps. Fill them with flexible filler to create a smooth surface.
Step 2. Apply Primer
Once the wall is ready, apply a waterproof primer or bonding agent using a roller or brush. This helps the waterproofing layer stick better and improves durability. Let it dry fully before moving on.
Step 3. Seal the Joints and Corners
Use waterproof tape over wall corners and around pipe outlets. Press it firmly into place. These areas are often where leaks start, so don’t rush this step.

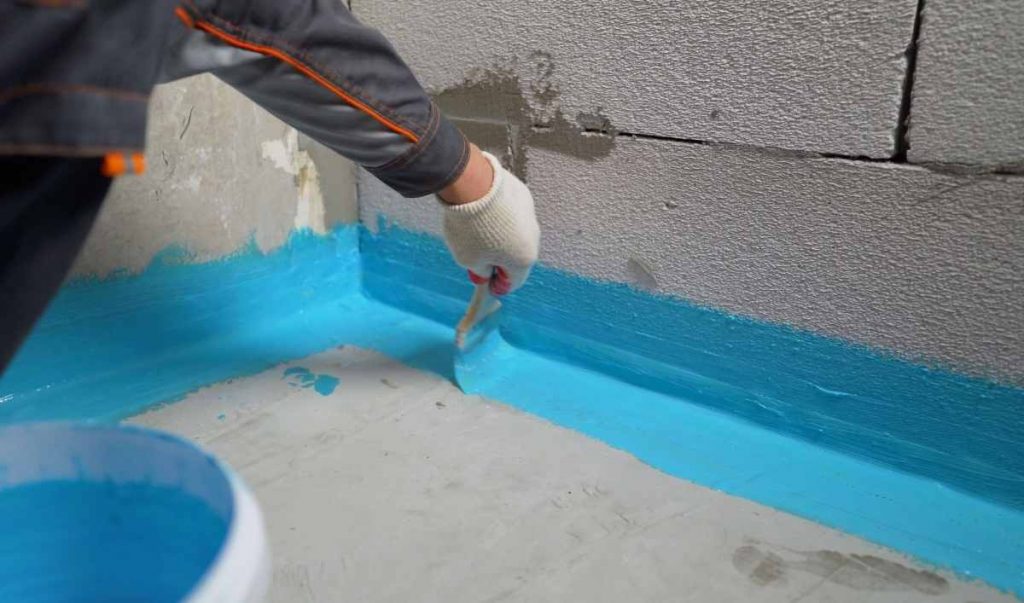
Step 4. Apply the Tanking Membrane
If you’re learning how to waterproof plasterboard before tiling, this is the most important step. Use a liquid tanking membrane and brush it evenly across all wall surfaces, especially around the shower area.
Apply two coats in opposite directions; the first horizontally, the second vertically. Let each coat dry completely. This creates a watertight barrier beneath your tiles.
Step 5. Reinforce the Shower Area
Around the shower enclosure, apply an extra coat of membrane up to at least 1.8m high. The goal is to ensure water cannot escape behind the tiles or down into the plaster. This step is essential for how to waterproof a shower wall before tiling; it keeps the surface sealed, even under constant moisture.
Step 6. Waterproof the Floor and Lower Walls
Moisture doesn’t just stay on walls; it collects at the base. Extend your waterproofing layer down to the floor, overlapping slightly with your wall coating. If your project includes tiling floors too, follow the same tanking process there.
Step 7. Let It Cure and Test
Once the final coat is dry, run a simple check. Spray a light mist of water on the surface; it should bead up instead of soaking in. If it doesn’t, apply one more thin coat.
The 4 Types of Shower Waterproofing
Not all waterproofing systems are the same. Here are the main 4 types of shower waterproofing used in modern bathrooms:

- Liquid Membrane Systems: Easy to apply with a brush or roller. Great for DIY and small bathrooms.
- Sheet Membrane Systems: Rolled sheets of waterproof material fixed to walls. Ideal for professional installations.
- Waterproof Backer Boards: Prefabricated cement or foam boards that are fully waterproof. Common in Camden and Islington flats.
- Cementitious Waterproofing: A mix of cement and additives that harden into a waterproof coating. Best for heavy-duty or basement bathrooms.
Each system works differently, but the goal is the same: stop water before it reaches the wall structure.
Can You Tile Over Plaster or Plasterboard Walls?
Many people ask, can you tile directly onto plasterboard or can you tile on fresh plaster?
Here’s the rule:
- You can tile on plasterboard only if it’s waterproofed or moisture-resistant.
- Never tile over fresh plaster. It must dry completely first for at least 4 weeks or your tiles may peel off later.
- If you plan to tile over plaster walls, always prime and seal them before applying adhesive.
Skipping waterproofing might seem faster, but it’s one of the most common causes of cracked tiles and damp patches behind walls.
Avoid These Tiling Mistakes
Even skilled DIYers make small errors that lead to big leaks. Here’s what to avoid:
- Using normal plasterboard instead of waterproof type
- Forgetting to seal pipe outlets and corners
- Applying only one coat of membrane
- Tiling too soon before the waterproof layer dries
- Ignoring small gaps around fixtures
Water is sneaky; it finds every weak spot. Spending an extra hour sealing things properly can save you thousands in repairs later.
Pro Tips for Perfect Results
Want a finish that looks professional and lasts for years? Try these simple tips:
- Always use flexible tile adhesive and grout; they move slightly with temperature changes.
- Apply silicone sealant at wall joints and around fittings.
- Let waterproofing layers cure fully before tiling.
- In Camden’s older homes, reinforce weak walls with cement boards before waterproofing.
The AnimAnimus Promise: Waterproofing That Lasts
At AnimAnimus Construction, we don’t just waterproof walls; we protect homes. Our skilled bathroom fitters and renovation experts use top-quality materials and techniques to create waterproof, mould-free spaces across Islington, Camden, and Hackney.
Here’s what sets us apart:
- Tailored solutions: Every bathroom is unique, so we customise the waterproofing system to match your wall type.
- Skilled craftsmanship: From primer to tiles, our work meets the highest British building standards.
- Complete service: We handle tiling, plumbing, and finishing everything you need for a perfect shower enclosure.
If you’re planning a bathroom renovation or need reliable waterproofing in London, trust the team at AnimAnimus Construction to do it right the first time.
FAQs
Question 1. Can I waterproof plasterboard myself?
Answer: Yes, you can just use a liquid membrane and waterproof tape for all joints and corners.
Question 2. How long does waterproofing last?
Answer: Good-quality waterproofing can last over 10 years when installed correctly.
In the End:
So, how do you waterproof walls for a shower enclosure? Start with proper preparation, use the right materials, and never skip sealing joints or corners. Waterproofing may be hidden behind tiles, but it’s what keeps your bathroom strong and leak-free for years.
Thinking of upgrading your bathroom in Islington, Camden, or Hackney? Let AnimAnimus Construction handle it. We bring precision, expertise, and peace of mind to every project.